One Photoshop trick that is sure to grab attention is that of digitally manipulating two images together against a common background to make it seem as if it was a picture that was actually taken. In this tutorial, you are going to learn how to create a scene featuring you and a favorite celebrity, but the skills learned can be used to combine any set of images into one picture.
The skills you will learn in this tutorial are as follows:
- Selecting
- Extracting
- Superimposing
- Resizing/positioning
- Color correcting
First, you will need to find either a full body or waist up picture of your desired celebrity. It would look most natural if the picture was a more candid one, i.e. one that isn’t plastered all over posters in teenage girls’ bedrooms. It would be best if the picture was high resolution, clear and against a plain background and if they were the only one in it so as to make the editing process much easier. Name the picture whatever his/her name is and open it into a Photoshop document.

Using the magnetic lasso tool, trace around the body. Zoom into the picture to ensure that your lines are smooth. If you try to eyeball where the contours are from a distance, the cut out image will look very jagged. Also, don’t worry about fly away hairs or any loose minor details in the picture like strings on shirts. Trace around them.


If you mess up while tracing and accidentally go outside of the lines and include too much or go inside of the lines and cut some off, just keep going. It can be fixed once you’re done with the rest of the cutting out. To add a part of the picture back into the selection, press and hold shift while tracing your line. To subtract part of the picture out of the selection, press and holding option while drawing your line. Press enter once the desired selection has been reached. Once you are happy with how your selection looks, save the selection by going to the select menu and clicking “save selection”. In the menu that comes up, name the selection the same name as the image file.


The next step is to find or take a full body or waist up picture of yourself (depending on which you used for the celebrity). It should also be high resolution, clear, and against a plain background. Save the picture and name it whatever your name is.

Open it into a separate Photoshop document and trace around the body the same way you did with the celebrity.


Once you’re happy with the way that selection looks, save it as well.


The hardest part is done, and now all that’s left is to think of the perfect backdrop you want to display your masterpiece against. You could make it as simple as just hanging out in the park, or you could go all out and create a romantic date in front of the Eiffel Tower. Once your destination is set, find a clear, high resolution image of it and name it appropriately. Open it into its own Photoshop document.

Go back to the Photoshop document of the celebrity and press command+C if on a Mac or control+C if on a PC to copy the cut out image. In the document containing the backdrop, press command/control+V to paste the image on top of it.

Repeat for the picture of yourself.

Play around with the positioning of the two pictures against the background so that it looks as natural and as not staged as possible. Resizing the images to make a believable height difference and slight overlapping are good techniques to achieve this. To resize the images, press command/control+T to bring up the transform box and then hold shift while dragging the corners of the box in order to maintain the proportions. At the sidebar containing the list of your layers, drag the layer you wish to be on top over the one you want underneath to create an overlap.
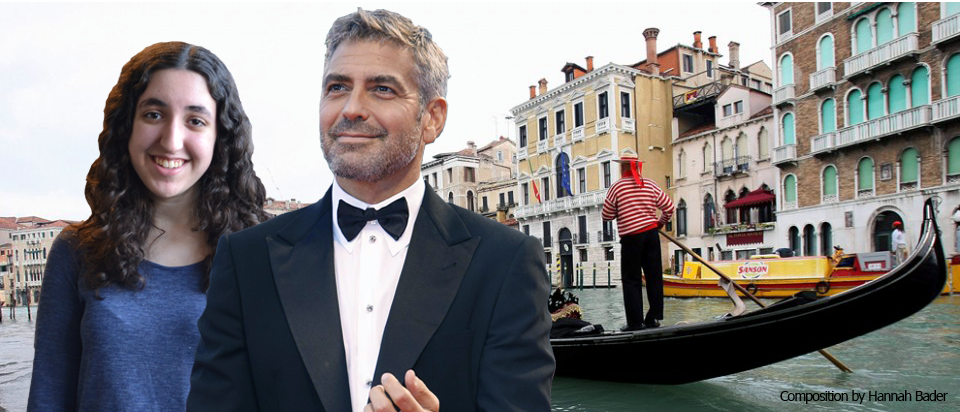
The last step of the process is to do some basic color corrections over the images to make them look more cohesive and like they belong together. In my example, the picture of George Clooney is a little orange in comparison to me and the picture of me is a little bit blue. To fix this, first click on the layer containing the picture of George Clooney and apply a color balance over it, bringing down the reds and bringing up the blues.

Doing this made the image of me even more blue, so apply another color balance on the layer containing the image of me in order to bring up the reds and bring down the blues.

Lastly, fixing the hues and saturations a little bit makes a difference in the overall cohesiveness of the image.

And there you have it – I have just made it look like George Clooney and I were in Venice together.

Post your final product all over the Internet and watch the comments and likes pour in. This is a sure fire way to make people stop and stare and make yourself seem a lot cooler than you actually are. A picture like this also makes a great gift for that friend who is mentally dating that certain celebrity. The possibilities with this Photoshop skill are endless.