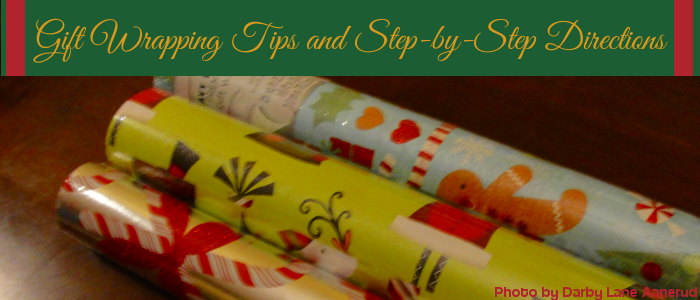
Talking with a few friends the other day, I mentioned my love for wrapping gifts and was faced with strange looks and stares. I then discovered many students don’t know how to wrap a gift or tie a bow.
“I let my mom do that. Whenever I wrap presents, it looks like a disaster,” said Student A.
“Dude, you’re so silly. It doesn’t matter how badly I wrap, the paper is going to be torn off and thrown in the trash anyways, “ said Student B.
Although the remark of Student B is a valid response, I hold the belief the wrapping of a gift may leave an impression upon the person you are gifting it to. And rather than get angry, I was determined to teach them how to wrap gifts, and do it well. Now I am determined to teach the whole student population a skill that will be useful for many years to come.
Supplies needed:
Gift(s)
Gift receipts that came with gifts
Box (if gift is not square)
Wrapping Paper
Tissue Paper
Tape
Scissors
Gift tags
Pen
Ribbon
Before you begin to wrap your gifts, take a pen and black out the prices on the gifts. Your mom might not want to know that you spent 3 dollars on that necklace you bought from the discount store.
(Skip to step 2 if gift is square and individual)
1. Prepping a gift that isn’t square or many gifts that require a box
Rather than trying to wrap that soccer ball you bought your little brother by rolling it multiple times in 5 ft of wrapping paper, putting it in a box will make the job of wrapping it much easier, and also consequently, make the process of opening the gift all the more fun.
With this example, I am wrapping multiple gifts in tissue paper that will all go into one box.
To wrap all your gifts individually in tissue paper, you will first want to place them face down on their own sheets of tissue paper. You do this so that when the person opens it, it is face up and they will see what it is. Fold the tissue paper on both sides horizontally and vertically, making sure to cover the whole gift. Set aside until they are placed in the box.
Oddly enough, it is proper gift wrapping etiquette to line your box with tissue paper. Apparently, it is a huge shocker that the inside of a box is brown. There is a special, and easy way to line your box with tissue paper. Start with one sheet of tissue paper and line it up next to the width of the box. Take one horizontal edge of the tissue paper and fold it on top of itself to line up directly with the box. Do the same with the top. If the box is bigger, you may have to repeat this many times to add enough length to both line the box and fold over on top of your gifts.
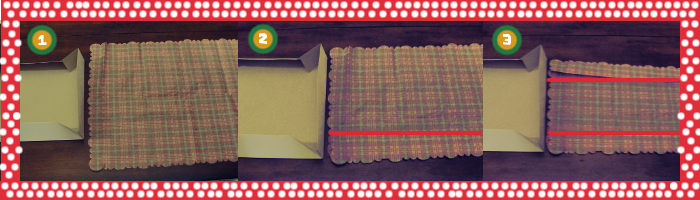
Red lines define where paper is folded.
Red lines drawn to define where paper was folded
After finished with folding tissue paper, place your gifts inside the lined box and fold tissue paper over on each side so that the gifts are hidden.
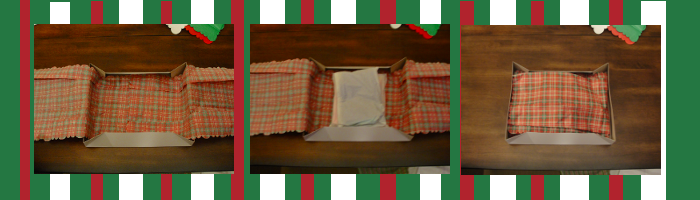
Before closing up the box, tape the gift receipt on the inside of the top covering. I would hope that the person you are gifting the gift to will not need it, but it is nice to give them an option to return it if they do not like it.
2. Wrapping gift in wrapping paper
The first step in wrapping a gift is trying to determine the amount of wrapping paper needed. This may induce anxiety in many, for you may come to find your have come up short in your estimate and are forced to throw out a sheet of perfectly good wrapping paper.
But there is a simple and mind-blowing way to easily estimate the amount of wrapping paper needed. We call it the Box Flipping Method.
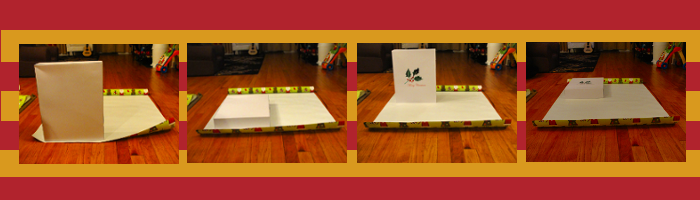
Start by rolling out a few feet of wrapping paper. Put your box or square gift on one of its sides. Flip the box forward, being sure to touch each side to the paper once. Only half of the measurement of the left and right sides is needed.
Cut off excess paper before wrapping so the process is more neat and less chaotic.
Center the gift face down on top of the wrapping paper. Take the left side of paper and bring up to top of box and hold firmly while taking other side and folding over the left. Tape once or twice, depending on length of box.
Now you will need to fold the other two ends in. Push the top down into the center. On the left and right sides, fold and crease inwards towards the middle, so that they look like right triangles. Take bottom half of paper and fold up towards middle and tape in the middle and on each diagonal. Repeat for opposite side. Be sure to not flip the box over in the process of the paper folding because then the two sides will look opposite and different.
For a cleaner more sleek look around the edges, pinch around the edges with your thumb and pointer finger nails.
3. Labelling your gift
Place adhesive or regular gift tag in top left or right corner. Write names of both the person the gift is to and who it is from.
4. Tying a bow on your gift
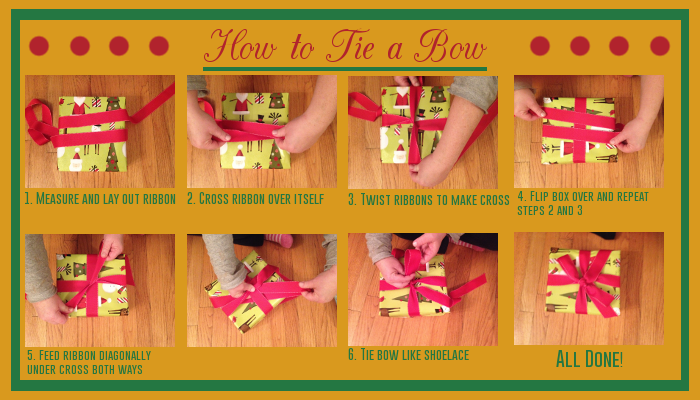
To tie your bow, measure enough ribbon using the Box Flipping Method (See above). Then, add a little more than half of that length, so that you have enough ribbon to tie a big and beautiful double knotted bow.
After you have the length of the ribbon, put the the gift face down and centered on top of the ribbon. Take both ends and make sure they are equal by raising them up to see if they meet. Now, cross and twist the ends over eachother, at a quarter of a turn, and pull very tightly to make a cross. Keep taught as you flip the present over.
On the top side, twist the ribbon again, just as you just did, in the center, and pull tightly. Put your finger in the center to keep tight. Feed the ribbon diagonally under the cross, which includes both ribbons, while still holding taught. Do the same with the other end of the ribbon in the opposite direction. Tighten and tie a knot.
At this point, your gift should have a cross on both sides. Now you are ready to make your bow.
Just as you would tie your shoe, tie the bow. Make the bow fall inch over your box. Once again, tie the ribbon in order to create a double knot. This will ensure that your bow will stay.
If you want to make the ends of your remaining ribbon curly, take the inside edge of a pair of scissors and place your thumb on the ribbon, being over the edge of the scissors. Pressing hard against the ribbon and the scissors, pretend you’re ripping off a band-aid and pull rapidly towards the end of the ribbon with your scissors. Repeat until the ribbon is curly and pretty.
Premade bows look just as cool as tied bows. With these, you should be able to take off a strip of paper to expose a sticky layer that will stick to your gift. Add in middle or on different corners to give a more unique look.
If you followed all of these steps, your gift should look wonderful and put a smile on your loved one’s face.
Don’t leave all your wrapping til the last minute! Gifting presents should be an enjoyable experience, so don’t stress about wrapping. It takes a lot of practice to be a good wrapper, so as you wrap more presents, you should be able to produce wrapped gifts in no time at all!
Happy wrapping and happy holidays! Go Vikings!